Monday, May 5, 2014

Progress on Final Project


These first two renderings shoe what the surface and modules would look like together from the inside of the building. With the way that the surface is positioned, the internal space is affected two different ways: on one floor the surface protrudes into the space, and in the other there is space created between the surface and the floor slab. The latter of the two created a spatial connection between two floors.


I used the inspiration of a string pulled in a dress to create the illusion of tightening and bulging on the surfaces. Where the surface is pulled in, I imagine that the entrance could be located there, drawing visitors into the building. As the pull continues, moment is implied within the building across the surface. 


The last two images demonstrate the surface being viewed from opposite perspectives. From the first angle, more light would be let in between each series compared to the second angle where less light is let in. This is due to the rotation of the geometry module and direction it faces in each series. 

Going forward I plan to experiment with how to connect this type of surface on all three sides. With the allowance of light changing, I want to have the angles correlate to the cardinal directions and imply where a visitor would circulate throughout the building. 


Tuesday, April 22, 2014

Paneling Tools in Grasshopper


Throughout this iterative design process, I learned a lot about adjusting the values in grasshopper to get different results. I most enjoyed the first two iterations of the design and experimenting with the size and scale. The results were interesting to see how the values influenced them. Going on to the final project, I will try and pursue the first iteration to create a paneled facade. 

Sunday, April 13, 2014

Progress with Grasshopper Surfaces


Above is the first iteration of the Grasshopper code and surface pattern. I used a piped closed spline to create the geometry of the lofted surface to arrive at this pattern.


Above is the second iteration of the Grasshopper code and patterned surface. After completing the first iteration, I changed the V count and Height, which added the six larger geometries. Instead of manipulating the entire pattern, it added to what existed already. This is something that I will continue to explore as I discover more about how to create interesting manipulations of the surface pattern. 

Monday, April 7, 2014

Grasshopper


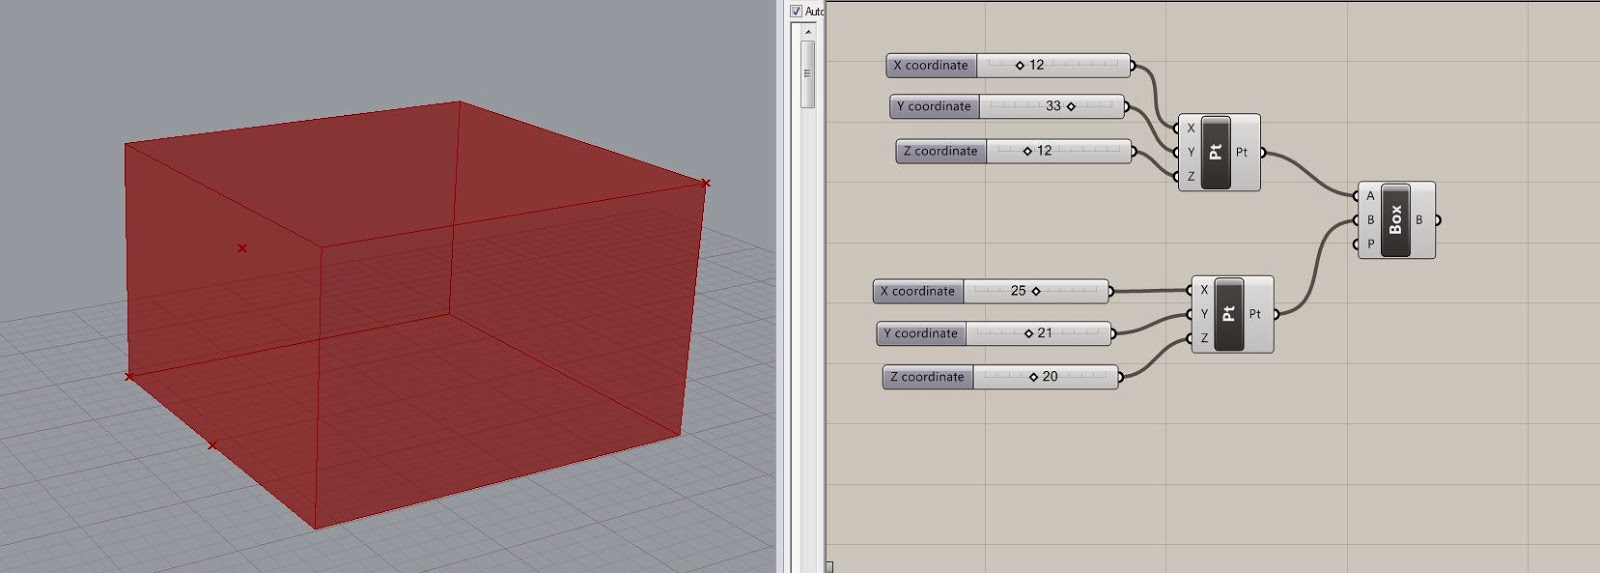
This was the first exercise and time during which I used Grasshopper. Although it was confusing at first, I quickly understood that using the primitive commands and constructing points allowed me to create each of the above volumes and surfaces easily.

Tuesday, March 11, 2014

Paneling Tools


This was the beginning of creating grids and surfaces. I experimented with making the grid both from an array, curve, or from a surface.


Three unique surfaces that will be used to create the panels.


These 2D panels were created from surfaces.


These 2D panels were created without surfaces, but using a grid to make the surfaces custom paneled.


This was the first attempt using the 3D paneling. I generated the pattern from solid tools, but found that the offset of the points is not very far, and therefore it does not look as 3D as the others.


I used two lofted closed curves to create this 3D custom panel. This time, I offset the distance of the points to be much further, so the three dimensionality of the pattern is much more apparent.


Rather than creating the grid on an open surface, this was created by two lofted surfaces. In addition, instead of creating the pattern with the solid tools, I used a single curve and extruded the curve to make a three dimensional closed curve. Because of the way I designed the grid, there is space between the vertical layers, giving a different appearance to the grid design.


This last 3D paneling design used an extruded curve once again, but this time each component of the pattern touches, making it more fluid.


Wednesday, March 5, 2014

This is my final board for A02. I struggled with designing this board, because fitting the desired diagrams and renderings together, in proximity to one another was difficult. After changing the layout from horizontal to vertical, I decided to stay with this layout, as it describes the direction of the contours and the way they come together. 

Throughout the construction of this project, I ran into a number of issues. Creating the notches in the layers was difficult, and after constructing the physical model I learned a number of things I would have done differently. First of all, the notches should be designed so that the perpendicular layer fits in tightly- this means that the dimension of the notch and of the chipboard should not be exactly the same. In addition, if both layer directions had notches, the final model would probably come out sturdier, and have evenly spaced layers. Overall, this project helped me learn many factors that are very important when translating from digital fabrication to physical modeling.

Saturday, March 1, 2014

Unfortunately last week I realized that I didn't account for the thickness of the chipboard that I was going to use when laser cutting each of the layers, and I had to restart the whole process to make it accurate. This process of restarting encouraged me to rethink my design of the waffle for the cube, though. I decided to explore the difference in the design of the cube if the contours were taken horizontally and vertically, versus at perpendicular diagonals. Although I am more intrigued by the design on the right, with the diagonals, I see problems that would arise while building the cube. For example, the extrusion is not from the diagonal surface, but instead to the CPlane. In addition, there are pieces that would be very difficult to connect, because of their shapes. Nonetheless, I am going to choose the cube on the left, with the horizontal and vertical contours, and experiment with the spacing between layers.

Monday, February 24, 2014


This week I have been working with the cube to create specific contour cuts that I will be laser cutting. As you can see in the bottom view of the first picture, I created an irregular waffle pattern. Instead of it being consistent throughout, the slices gradually get further apart towards one corner, and closer together in the opposite corner. In the second image, you can see some of the center contour slices that are slices with the notches for the two sets of directional slices to be put together.

Wednesday, February 12, 2014

The Cube project was a learning process that helped understand the basic tools of Rhino. Throughout each iteration of the cube, I connected the sides to make a continuous piece. Overall, I used what I learned through this exercise to create a cube that had an angular and rounded shapes on each side, connected through holes piercing multiple sides.

Monday, February 3, 2014

E02_Rhino to Illustrator

To make these shapes, I started with making cubes in Rhino. Then, I experimented with the boolean difference and intersecting unique shapes to make these resulting figures. In that process, I practiced using the pipe command as well as making different scaled shapes. Finally, I exported the shapes as 2D graphics into Illustrator. Unfortunately, I really struggled with trying to figure out how to use line weights.